How to Lock or Vest Tokens on WAX
Lock tokens until a date, or vest them gradually — with public, on-chain proof anyone can check.
A LOCK holds tokens until a release date, then makes them claimable in full. VESTING releases them gradually across a period, optionally after a cliff during which nothing is released at all.
The point of both is credibility. Anyone can say "the team tokens are locked for a year". A lock is the version of that sentence a stranger can verify without trusting you — every lock has a public page showing the amount, the date and the contract holding it.
The most common uses: locking liquidity so buyers can see it cannot be pulled, vesting a team or advisor allocation so it cannot all be sold on day one, and holding a treasury allocation until a milestone date.
Step by step
- 1
Decide: lock or vesting
A FLAT LOCK releases the entire amount at one moment — nothing is claimable before the unlock date, everything is claimable after it. Use it for liquidity, or for anything where partial release makes no sense. LINEAR VESTING releases continuously across the duration you set, so the beneficiary can claim whatever has vested at any point. Use it for team and advisor allocations, where the goal is to align someone over time rather than to freeze a number. You can add a CLIFF to vesting: a date before which nothing is claimable at all, after which the vested portion unlocks at once and then continues accruing. A 12-month vest with a 3-month cliff releases nothing for 3 months, then 3 months’ worth in one go, then continuously.
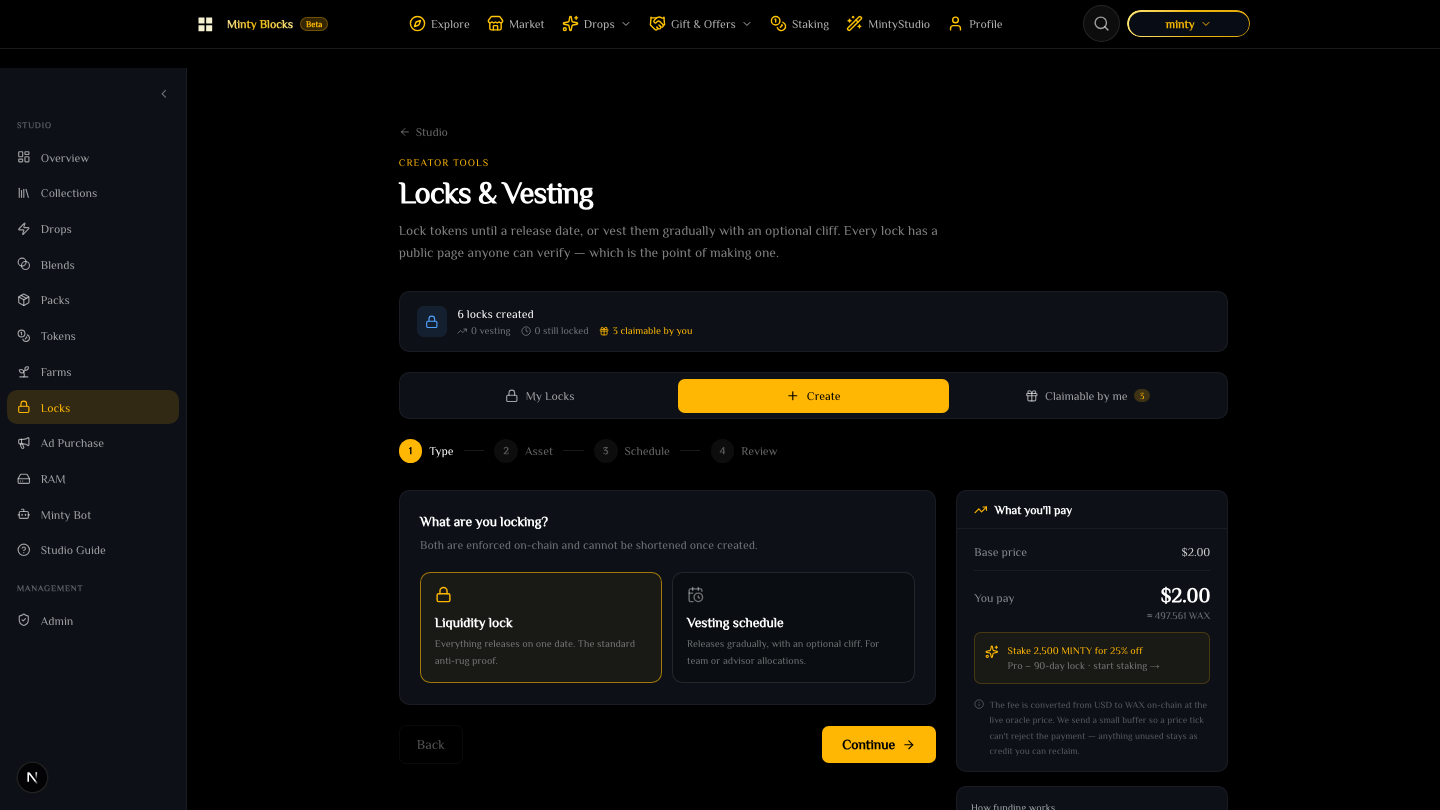
Step 1 of the lock wizard: choosing between a liquidity lock and a vesting schedule, with the fee quoted in dollars and WAX— tap to enlarge - 2
Open MintyStudio → Locks
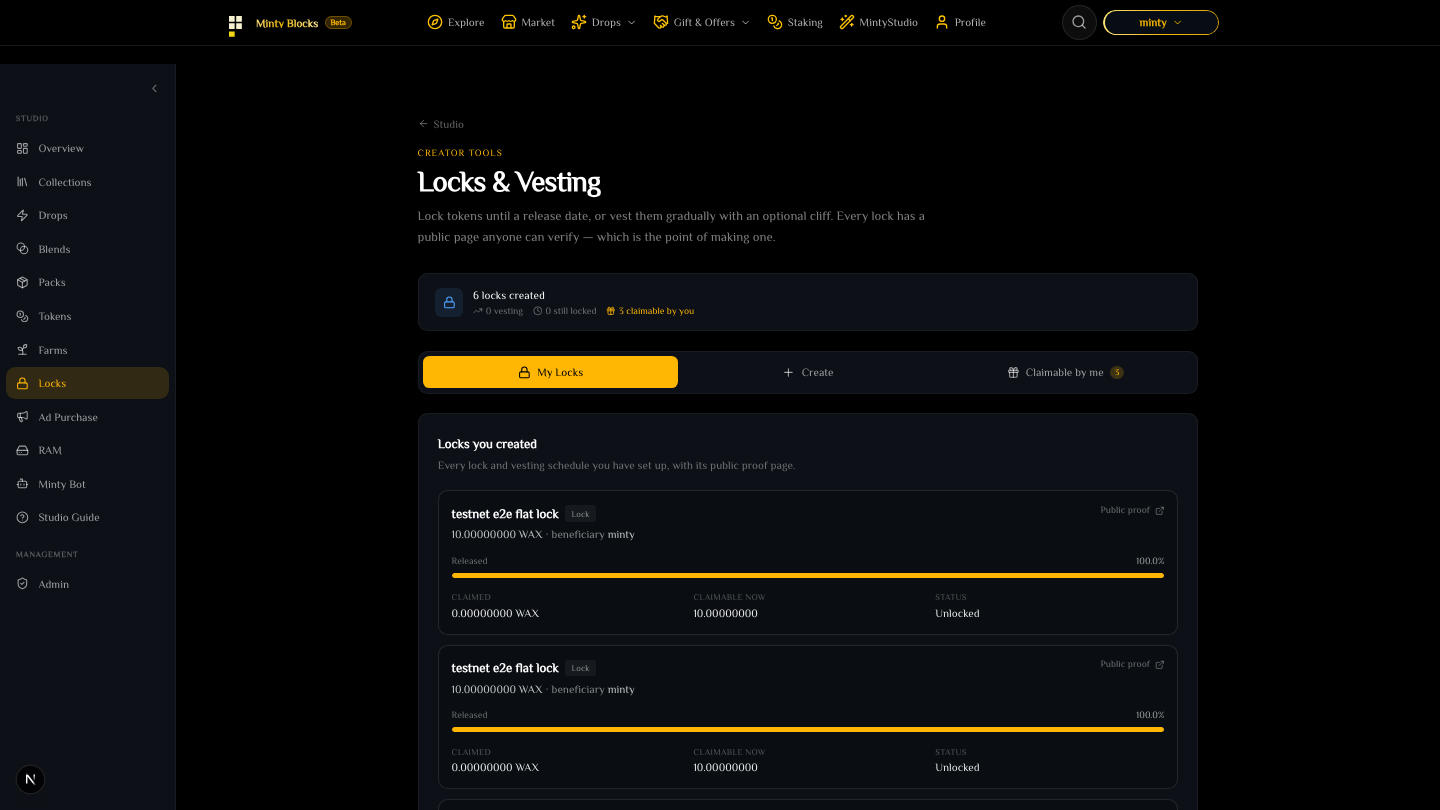
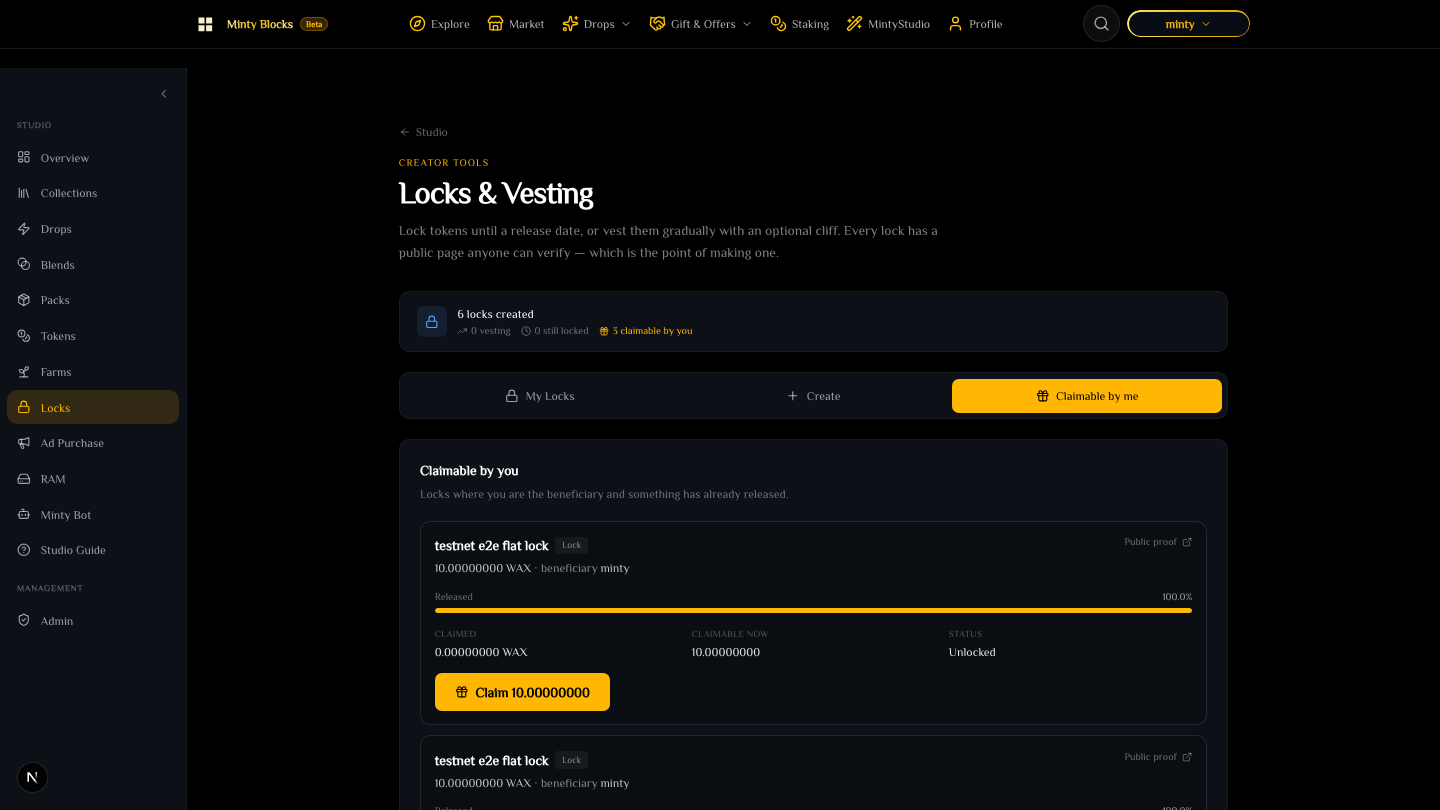
Three tabs. MY LOCKS lists everything you created, with a progress bar showing how much has released. CREATE is the form. CLAIMABLE BY ME is separate and answers a different question — a lock you created for someone else is yours to track, one created for you is yours to claim, and only the second needs a claim button. It shows a count badge when something is waiting for you.
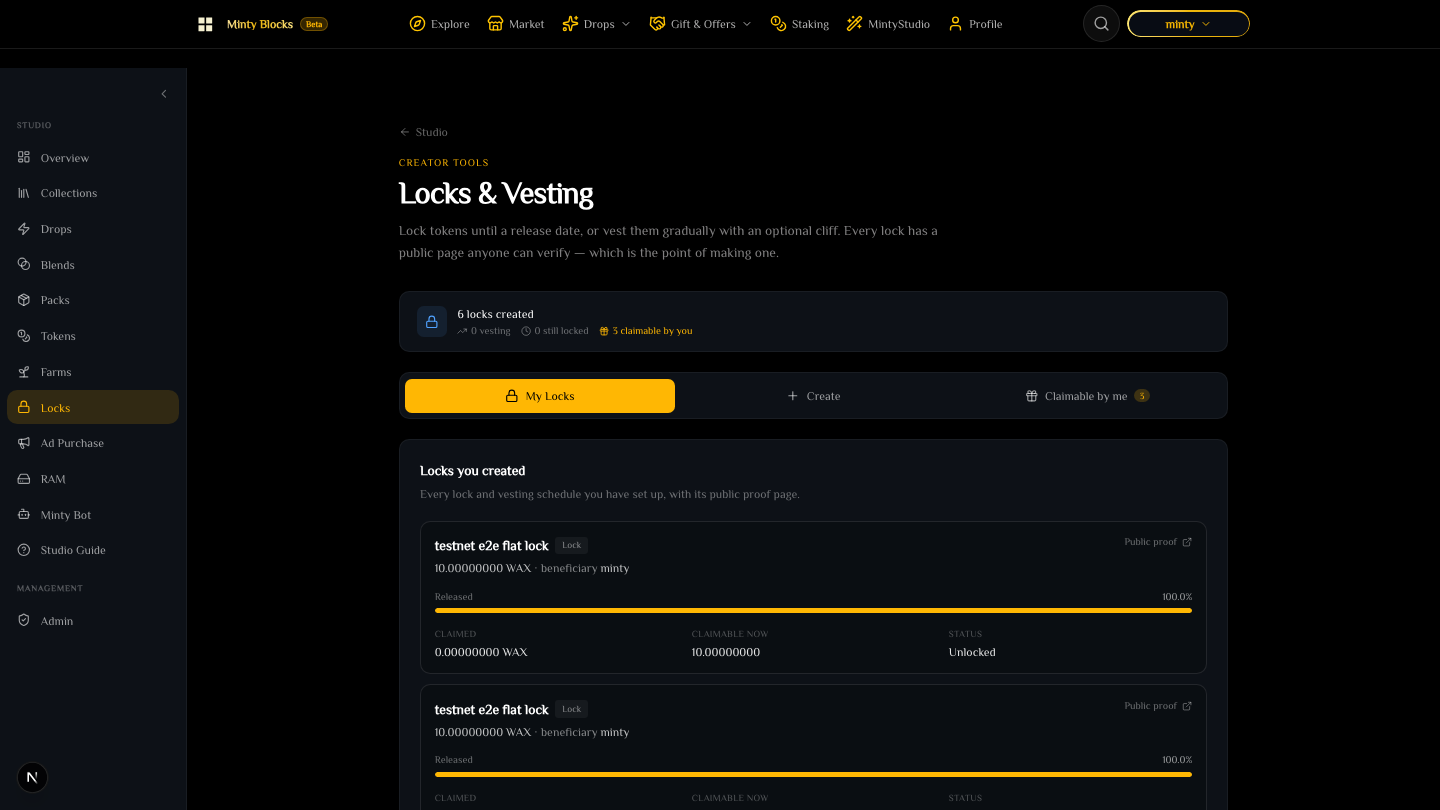
The Locks tab: My Locks, Create, and Claimable by me— tap to enlarge - 3
Set the amount and the beneficiary
This is the ASSET step. Start with the TOKEN CONTRACT — the account the token lives on, not its ticker. eosio.token holds WAX; a community token lives on whatever account deployed it, and an Alcor LP token on Alcor’s. Getting this wrong is the most common mistake here, because two different tokens can share a ticker and only the contract tells them apart. Then the AMOUNT, which must be within the balance shown beneath the field — the contract verifies the exact figure when you fund, and a mismatch is rejected rather than absorbed, so a lock created for more than you hold simply cannot be funded. Finally the BENEFICIARY — the account that will be able to claim. It can be you, a team member, or a treasury account, and it defaults to you. THE BENEFICIARY IS FIXED AT CREATION AND CANNOT BE CHANGED. Check it character by character: if it is wrong, the tokens release to the wrong account on schedule and nobody can stop that. If the account does not exist, they are simply gone. Continue stays disabled until the amount is filled in.
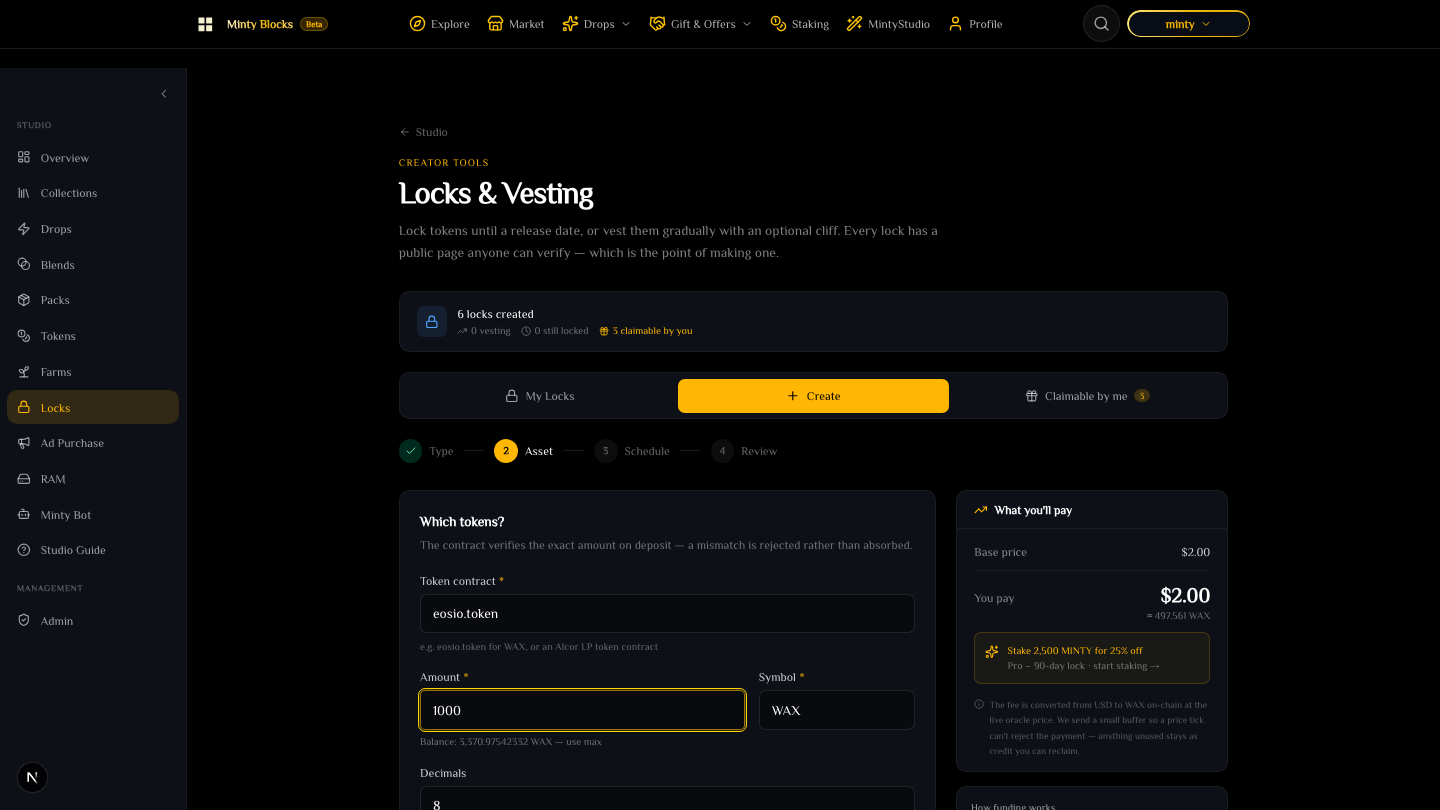
The Asset step of the lock wizard, with the token contract, amount and beneficiary filled in and the wallet balance shown beneath— tap to enlarge - 4
Set the schedule
FLAT LOCK: choose the unlock date. Everything releases at that moment. VESTING: choose the start, the duration, and optionally the cliff. Claiming exactly at the cliff second succeeds — the boundary is inclusive. The bounds allowed are set by the contract; the form will reject a duration outside them before you sign rather than letting the chain reject it.
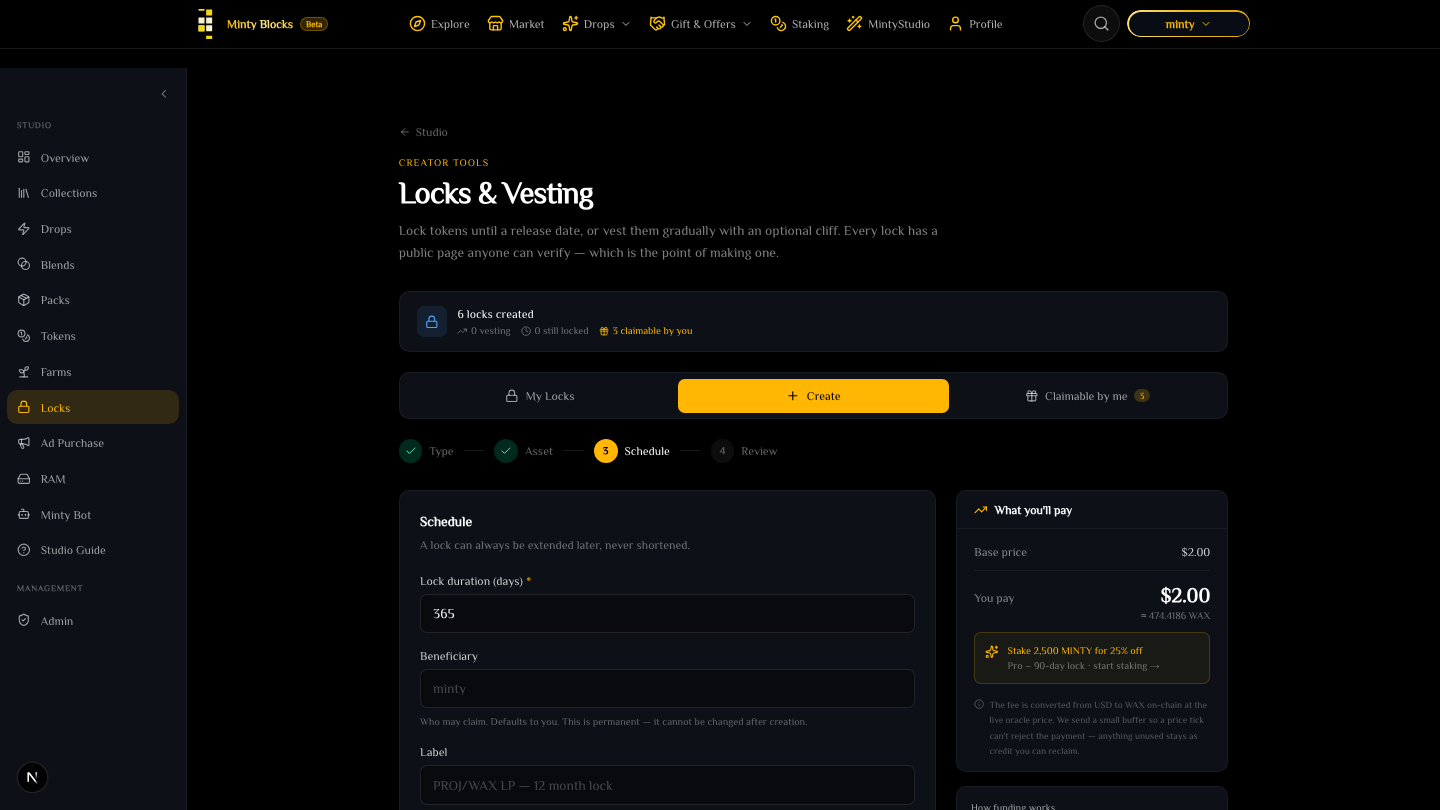
The Schedule step, with the lock duration in days, the beneficiary and an optional label, beside the fee panel— tap to enlarge - 5
Pay the fee and create
The fee panel shows the price with your MINTY tier discount applied and the exact WAX to send. The fee payment and the lock creation are bundled into ONE signature, so you can never end up having paid without a lock.
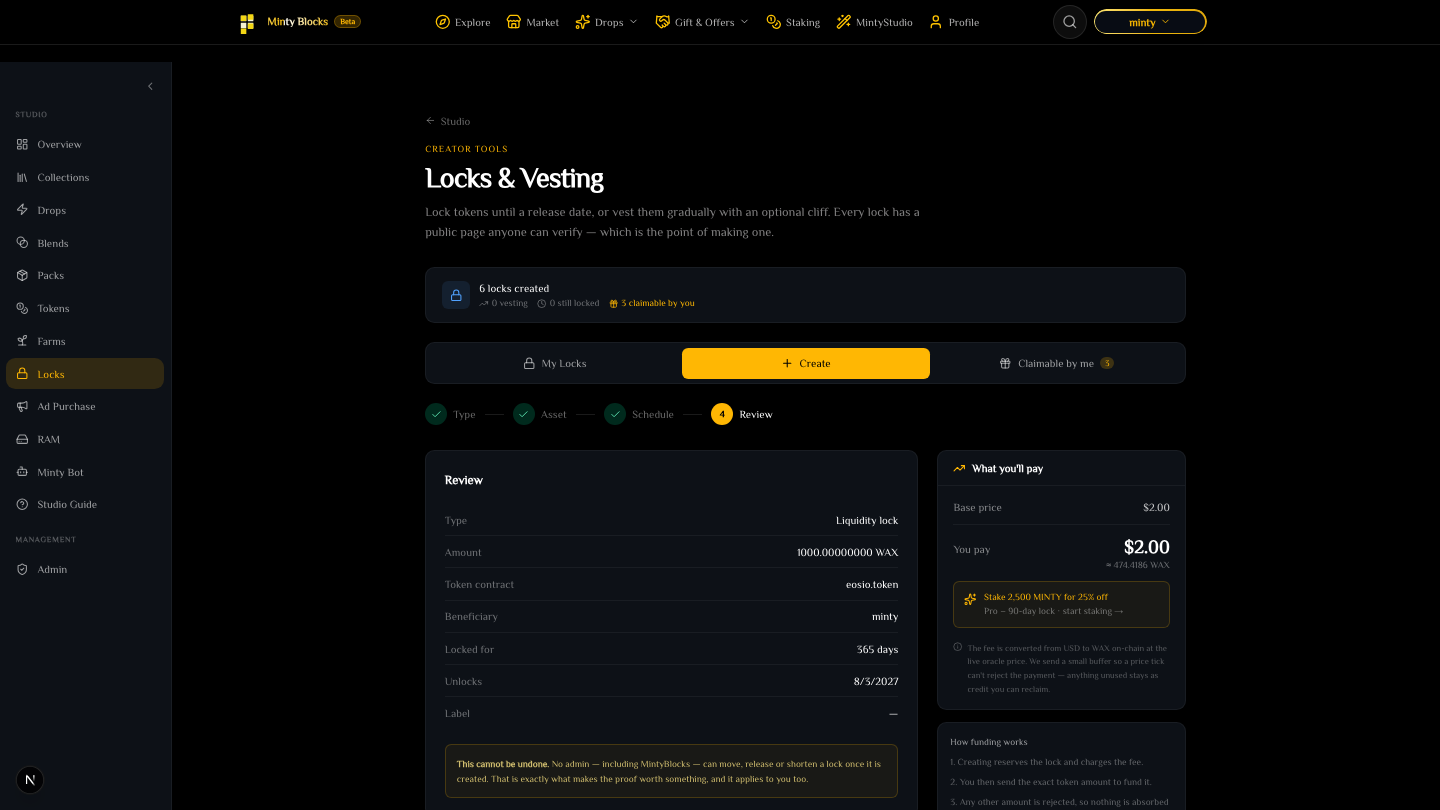
The review step with the fee to sign before the lock is created— tap to enlarge - 6
Fund it within the hour — the step people forget
Creating a lock does not move any tokens. It reserves the deposit and charges the fee; the tokens stay in your wallet until you send them. You have ONE HOUR to do that. The contract holds the reservation for exactly that long and then refuses the deposit permanently — the lock stays empty, the fee is spent, and you have to create it again. Fund it from MintyStudio → Locks → My Locks, which shows the exact amount and a countdown to the deadline. Send that amount precisely: the contract rejects anything else rather than absorbing it, so a wrong figure cannot cost you tokens, only time. A project that links to an unfunded lock as proof is showing an empty box, and anyone who clicks through will see that.
A created but unfunded lock, showing the funding transfer and its deadline— tap to enlarge - 7
If the hour runs out
The lock becomes a dead lock: reserved, paid for, and impossible to fund. Nothing is lost except the creation fee — your tokens never left your wallet. Clear it with the button on the lock in My Locks, which calls cleanpending on the contract. That erases both the reservation and the empty lock row, so it stops appearing in your list and on the public locks page, and returns the RAM to whoever paid for it. Anyone can call cleanpending, not just the owner, so a dead lock left by someone else can also be tidied away. Then create the lock again and fund it inside the hour.
- 8
Check the proof page
Every lock has a public page at /locks/<id> showing the amount locked, the unlock date, the owner, the beneficiary, and a direct link to the contract table on the block explorer so anyone can verify it independently. This is the link you share. It also carries a plain statement that a lock proves the tokens cannot move before the date shown — and that it is not an endorsement and says nothing about the project’s safety.
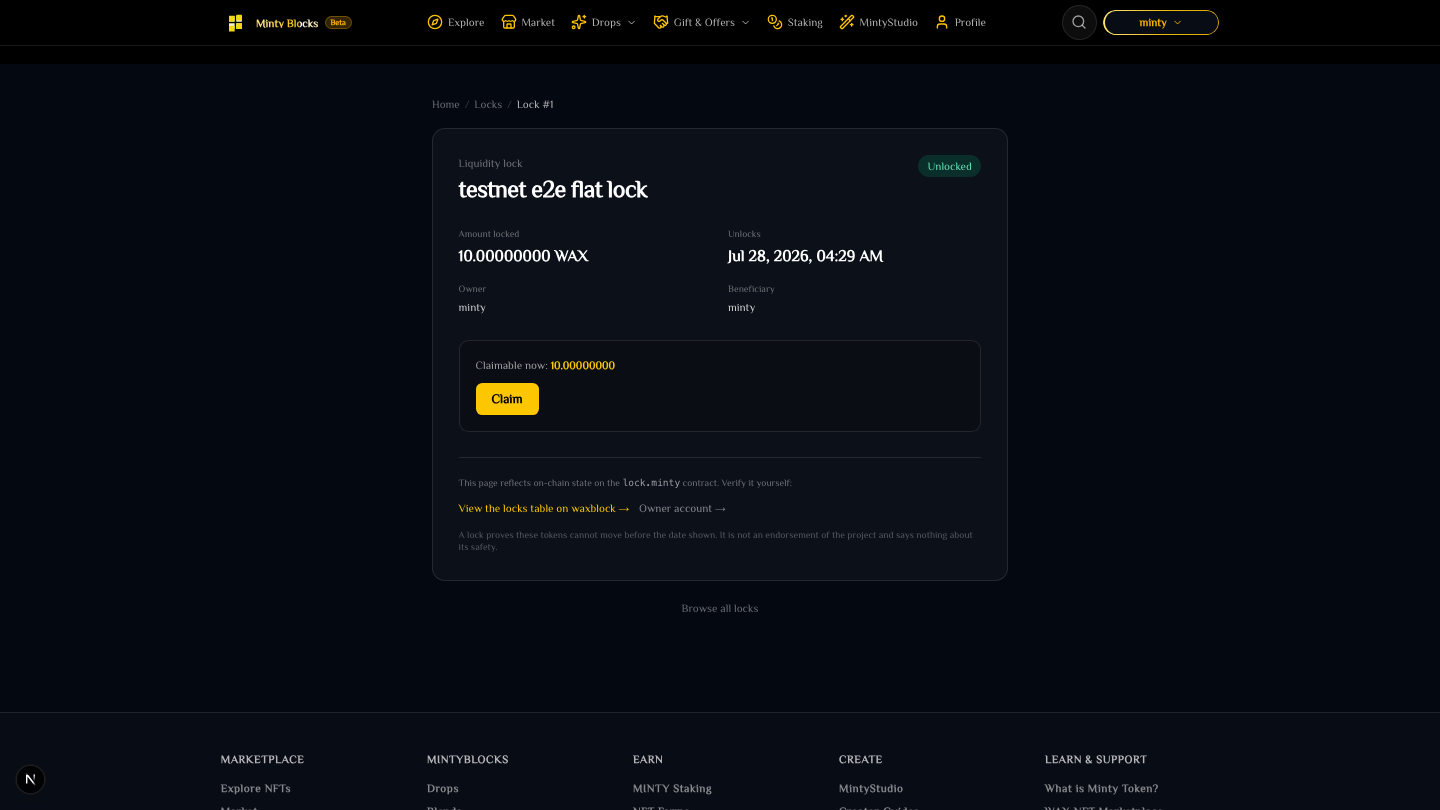
A public lock proof page showing amount, unlock date, owner and beneficiary— tap to enlarge - 9
Claim as it releases
The beneficiary claims whatever is currently claimable. With vesting you can claim repeatedly as more vests — there is no penalty for claiming often, and no benefit to waiting. The final claim always settles the exact remainder, so no dust is ever stranded. With a flat lock there is nothing to claim until the unlock date, then everything at once.
The public locks list showing locked amounts and unlock dates— tap to enlarge - 10
Worked example — a 12-month team vest with a 3-month cliff
You are holding 100,000 ONEUP for a co-founder. Kind: vesting. Amount: 100,000 ONEUP. Beneficiary: their account. Start: today. Duration: 365 days. Cliff: 90 days. For the first 90 days the claimable amount is zero. On day 90 roughly 24,650 ONEUP becomes claimable in one go (90/365 of the total). From then it accrues continuously, and on day 365 the last claim settles the exact remainder so the total claimed is exactly 100,000. If they leave before the cliff, nothing has been released — but note the lock still pays out on schedule regardless, so a lock is not a substitute for an agreement about what happens if someone leaves.
Nobody can release a lock early
There is no admin action that releases a lock ahead of schedule and no key that overrides it — not yours, not ours. That is exactly what makes the proof worth anything. It also means a mistake cannot be undone: an amount locked for 10 years is locked for 10 years.
Common mistakes
Creating a lock and never funding it, then linking to it as proof. Getting the beneficiary wrong — it cannot be changed. Locking tokens you needed for liquidity or an exchange listing. Choosing a duration far longer than the promise you actually made, and then having no way to shorten it. Assuming a cliff means "nothing until then, then everything" — a cliff releases only the portion vested by that point, and the rest continues accruing.
What a lock does and does not prove
It proves a specific amount of a specific token cannot move before a specific date. It does not prove the project is legitimate, that the locked tokens are all the team holds, or that another wallet is not holding ten times as much unlocked. Read what is locked as carefully as the fact that something is.
Ready to try it?
Open MintyStudio and start building on WAX.
Related guides
Looking for general questions instead? Visit the MintyBlocks FAQ · All MintyStudio guides